Sooooo.... coming back from a session up at Mason, Yerb starts telling us that his mom has some property that we might be able to build a ramp on. He also mentions that there is a barn but that it might be too small to even consider.
With the idea that we would be building an outdoor ramp, we show up at the property to scope things out. The property was very nice! Out in the country with very few neighbors made it an ideal location. But.. there sat that barn. One look at the barn and you could see minds starting to spin. It didn't take much to decide that an indoor ramp was the only way to go.
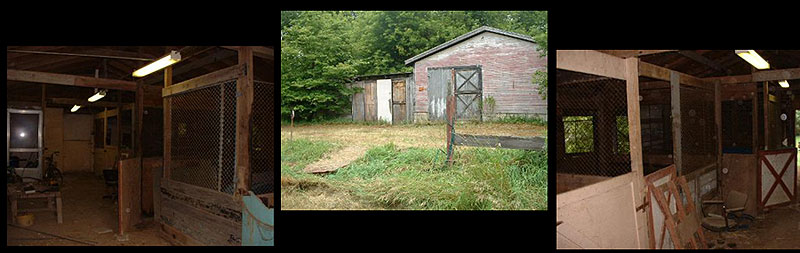
Barn had its problems though. It had horse stalls, a small tack room, a leaking roof and a bunch of garbage was being stored in it. Even after removing all that there wasn't really enough headroom to make a very tall ramp. The LAST thing we wanted to do was build a little 3'-4' high ramp. But this barn was our only option. If we wanted to have an indoor ramp we would have to figure something out.
Ok .. the first thing we do is rip out all the horse stalls. Now.. some of the stalls also provided support to the roof. Jim, our construction thugboss, had an idea about how to brace the roof up. We also needed to seal up some holes in the wall. We used an assortment of boards cut to size and that expanding spray foam shit. We used the foam to fill in any cracks. After a couple of days of work, we were looking at an empty barn with a braced up roof.
Now.. to deal with the lack of headspace we decided to lower the floor. The only way that was going to happen was to remove part of one wall so that we could get a "bobcat/skid steer" in there to dig the floor out. Yerb did some amazing wheelers with that bobcat as he was taking dirt out. Overall he lowered the floor about 3 feet. He ended up mounding the dirt up just outside the barn and we have been using that as part of a motocross track. ;-)
With the floor lowered and the building in good shape it was now time to build. We got together and talked about design and concept. LOTS of ideas were brought up. A bowl ..curved on one side, vert wall ride, spine .. in the end we decided to go with a simple, old fashioned half pipe. 8' transitions cut at 5'6", 12' of flatspace and 20' wide. Pool coping was a must. When it was done it would be close to 6' tall. Not a huge ramp .. but we knew it was going to be cool.
Yerb and MLB had been collecting up used wood. Wood is pretty damn expensive these days so if we could save some cash going with used thats cool. Plus its a good way to recycle. We still ended up buying lots of new wood. We ended up buying wood as we needed it. Since we were filling up the barn space with framework there wasn't much room to store materials.
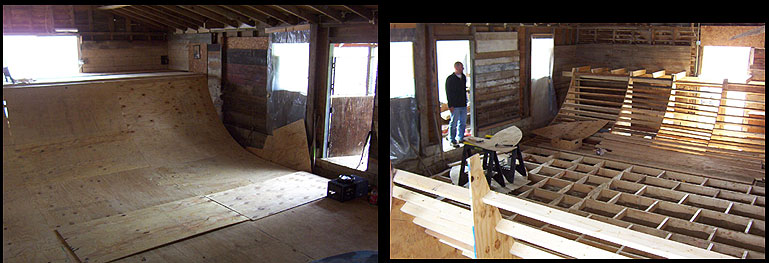
Contruction was pretty straight forward. Templates, cross members, LOTS of cross members. We tend to over engineer our ramps. We have to. We have skaters like MLB who are just way burly. Templates were cut out of 3/4" plywood. Cross members were all 2"x6" in the flatspace and the bottom part of the transitions. 2"x4" was used on the upper part of the transitions. The riding surface is 2 layers of 1/2" plywood and one layer of 1/4" hardwood veneer all wood screwed together. It doesn't move.
The search for pool coping lead to several expensive options. I knew that Modern Skate's pool was "hand poured" pool coping. After Yerboy and I rode that pool we decided that idea could work for us. Only we wanted something a bit beefier then what they have at Modern.
Chris Day is an old friend and professional cement guy. After describing what we wanted to do he was all .. "Thats easy to do..all we need is .. ", and he pretty much describes the process on how to make coping off the top of his head. He used a variation of aprocess that he uses to make concrete steps.
Cool enough.
It didn't take much to decide that Chris' coping was the way to go.
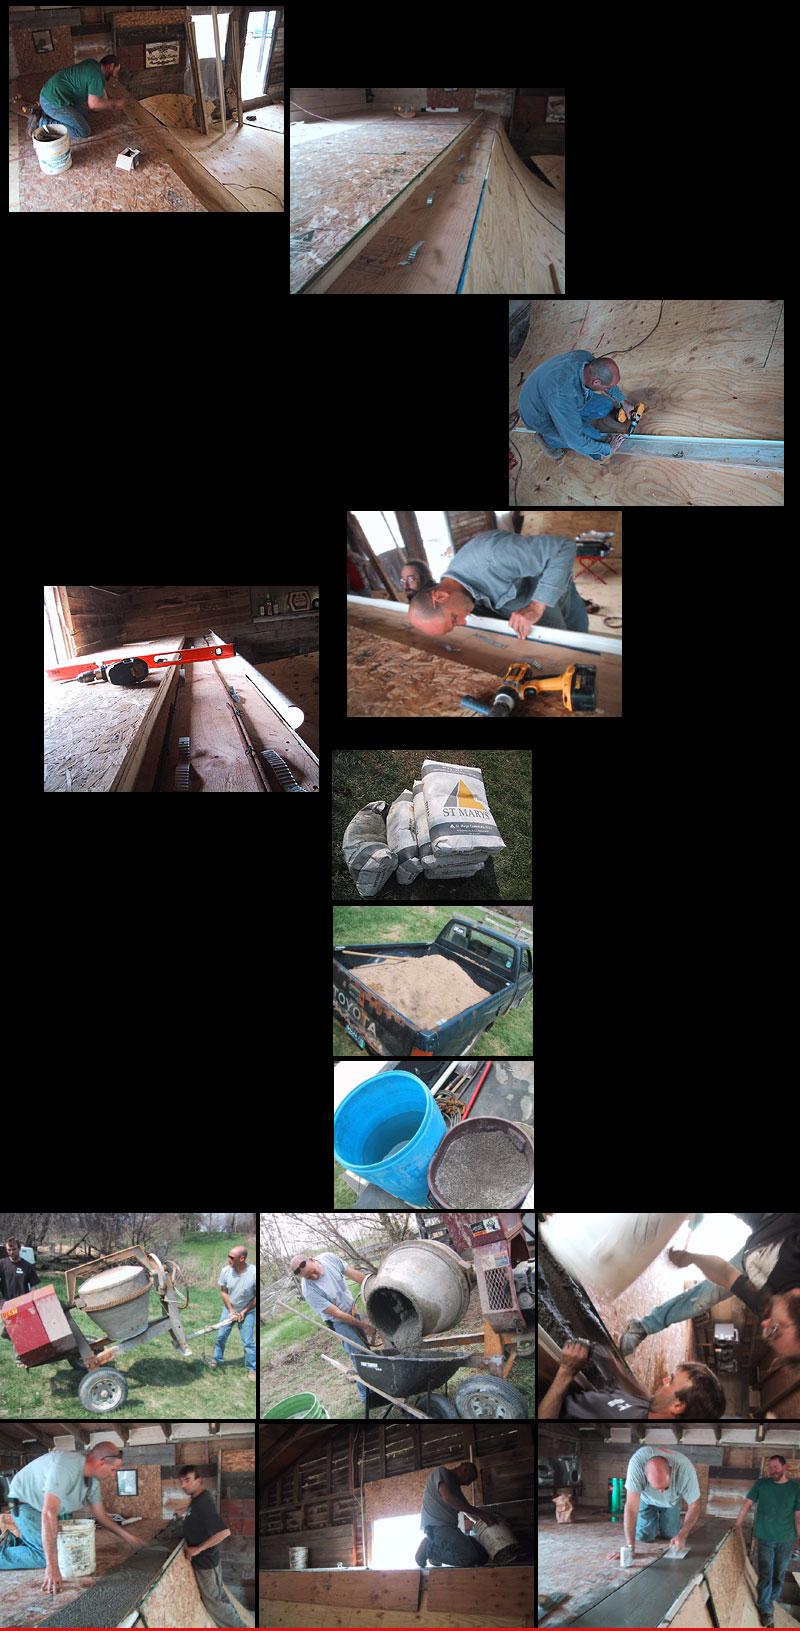
After letting the coping cure for about a week, it was time to pull the molds off and see how the lip turned out. To our surprize it wasn't as glass smooth as we thought it would have been. Thats no problem though. Some of the bigger air bubbles we filled with hydralic cement. After a chat with Dave Tuck .. we were advised to paint it with polyurethane. Ok .. so we lay down a single coat, let it dry and gave it a ride. The edge was way gnarly .. with just enough slip to make 50-50s fun. After just a couple of sessions we repainted with another coat of polyurethane as we had ground the first layer off. ;-)
Now it was time to put down the final riding layer. After a few trips to the lumber yard the best option we found was this 1/4" hardwood ply with one side smooth and knothole free. This stuff was also only $10 a sheet! The first two layers were 1/2" CDX type plywood and one layer was $15 a sheet and the next week it jumped up to $18 per sheet. Bah. We used wood screws long enough to go through all 3 layers. That one action bonded all three layers together and made for a ramp that DOES NOT move at all.
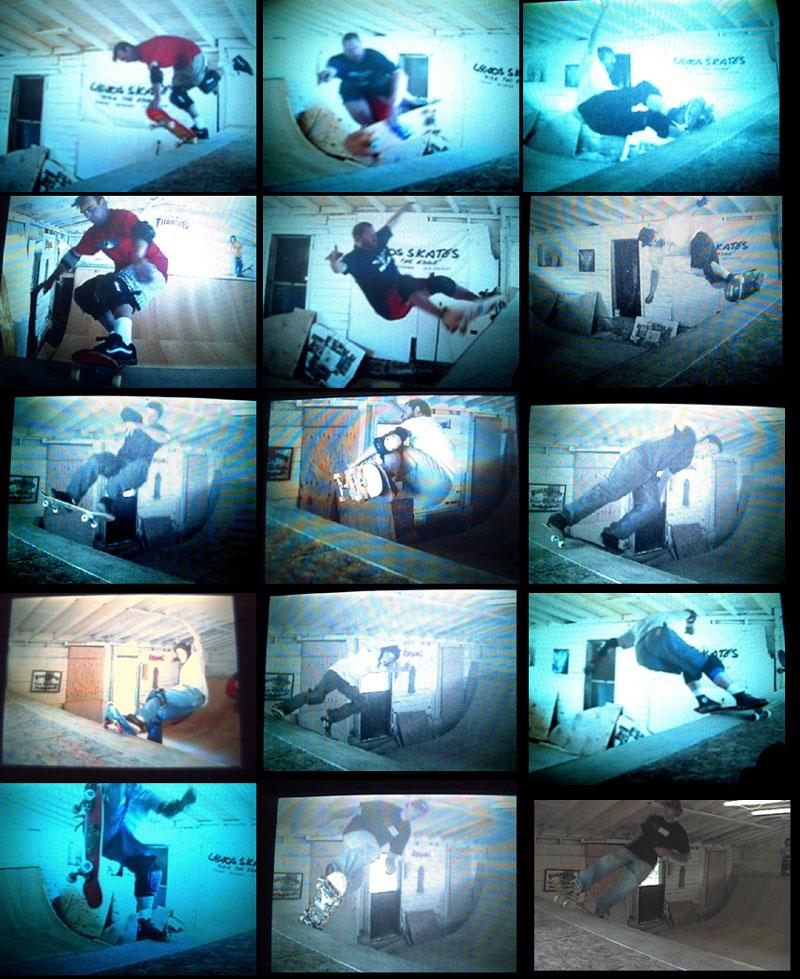
Sessions are taking place and HVR is proving to be worth ALL the hassle we went through to make it happen. See below for evidence of extreme fun.